Zoom / Radial Blur COP
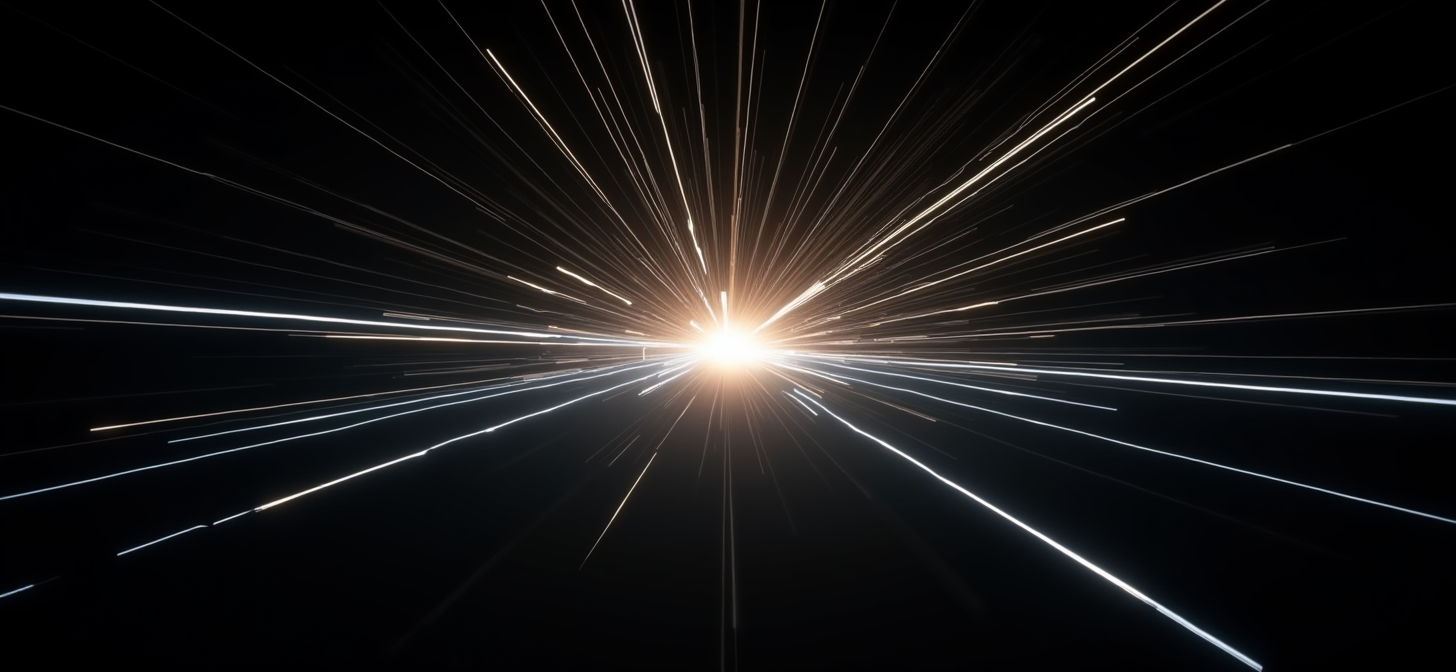
By the end of this tutorial you will be able to apply a zoom (radial scale) blur or a spin (arc) blur to any image in a Houdini Copernicus network, with full control over center position and sample quality.
Prerequisites
- Houdini 20.5 or later
zoom_blur_cop.hdainstalled (see Step 1)- A COP network with at least one image source node
What You’ll Learn
- Apply a zoom blur that streaks outward from a controllable center point
- Switch to a radial spin blur that smears along an arc around the same center
- Position the blur center in normalized screen space or exact pixel coordinates
- Trade sample count for quality versus cook speed
Step 1: Install the HDA
In Houdini, go to Assets > Install Asset Library, select zoom_blur_cop.hda, and click Install.
Checkpoint: Press Tab inside any COP network and type
zoom— you should see Zoom / Radial Blur COP in the menu.
Step 2: Set Up the Network
Inside a COP network, create a File node pointing at your source image. Then press Tab and choose Zoom / Radial Blur COP. Connect the output of the File node to input 0 of zoom_blur_cop1. Click the display flag on zoom_blur_cop1 to make it the active output.
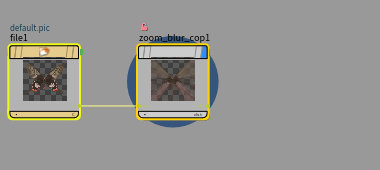
Checkpoint: The COP viewer shows your image processed by the blur node (even at default settings it will show radial streaking). The display flag (blue circle) is on
zoom_blur_cop1.
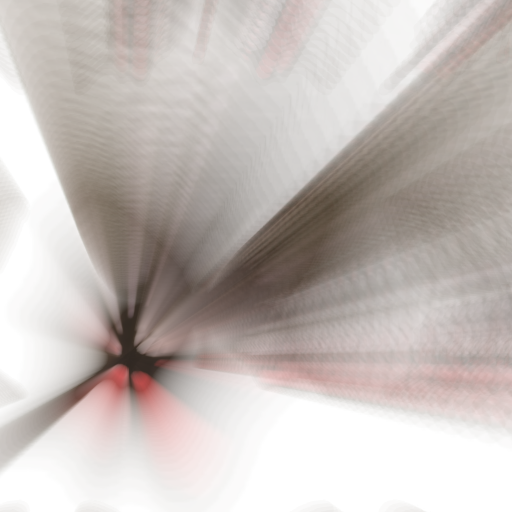
Step 3: Apply a Zoom Blur
Select zoom_blur_cop1. In the Parameters panel you will see two folders: Blur and Center.
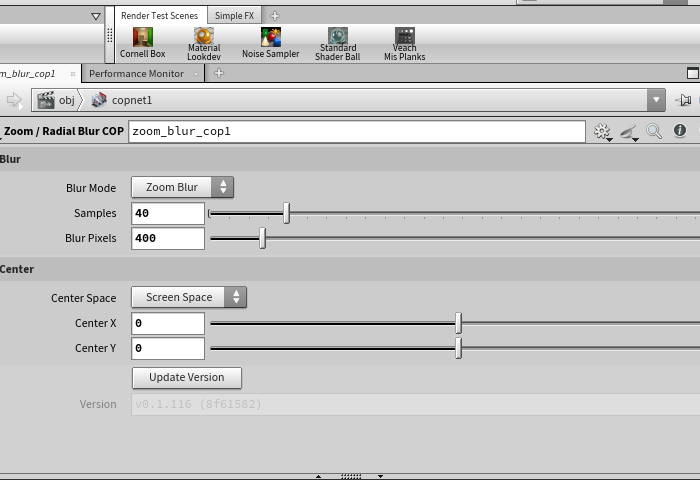
The defaults produce a strong zoom blur:
| Parameter | Default | What it controls |
|---|---|---|
| Blur Mode | Zoom Blur | Which blur type to apply |
| Samples | 20 | Number of samples along the blur path |
| Blur Pixels | 600 | Radial reach of the blur, in image pixels |
Blur Pixels is the most important control. At 600 on a 1920-wide image the blur extends roughly one-third of the image width outward from center. Lower values produce subtle motion-blur halos; higher values create full explosion-streak effects.
Checkpoint: Streaks radiate outward from the center of the image.
Step 4: Adjust the Blur Center
Open the Center folder. By default Center Space is Screen Space, where coordinates run from −1 to +1 on the X axis (0 = image center, −1 = left edge, +1 = right edge). Y uses the same scale but aspect-corrected, with 0 at image center and positive values toward the top.
Change Center X and Center Y to pull the vanishing point off-center:
Checkpoint: Streaks converge toward your chosen point instead of the image center.
Pixel mode is available when you need precise placement. Set Center Space to Pixels and enter coordinates in Center X (px) / Center Y (px). Pixel (0, 0) is the bottom-left corner of the image — flip Y relative to top-down conventions. A point 100 px from the top of a 1080-tall image is at Y = 980.
Step 5: Switch to Radial (Spin) Blur
Set Blur Mode to Radial Blur. The Blur Pixels slider hides and Blur Angle appears in its place.
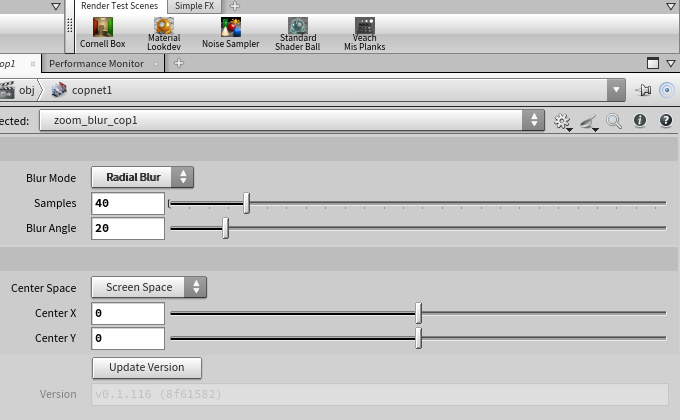
| Parameter | Default | What it controls |
|---|---|---|
| Blur Angle | 15 | Arc angle (degrees) of the spin blur around center |
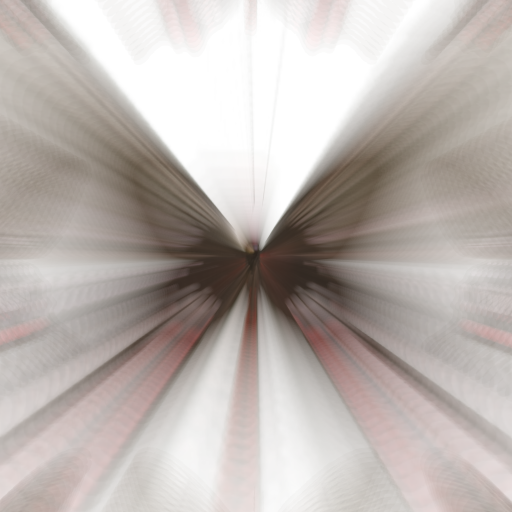
Instead of streaking outward, samples are distributed along an arc at constant distance from the center. This creates a rotational smear — the further a pixel is from center, the longer its streak appears in screen space.
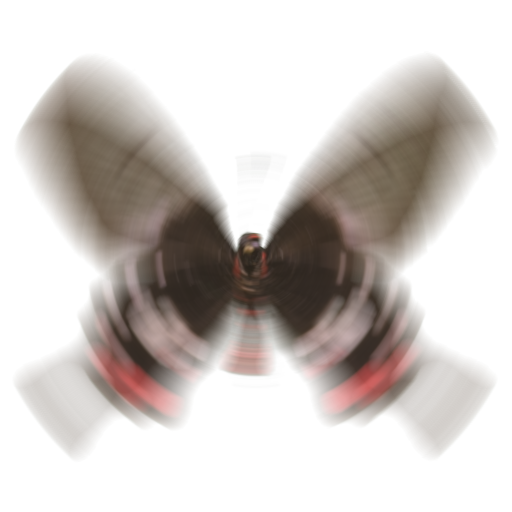
Checkpoint: The image shows rotational smearing — pixels close to the center are nearly sharp while distant pixels show long arcs.
Step 6: Tune Sample Count
Samples controls the number of points distributed along the blur path. Fewer samples cook faster but produce visible banding or graininess on smooth gradients.
| Samples | Use case |
|---|---|
| 10–20 | Layout preview — fast, visible banding |
| 40–60 | Final comp on most images |
| 80–128 | Large Blur Pixels or Blur Angle values where banding is visible |
Increase Samples only as far as needed — cook time scales linearly.
Result
A single node handles both zoom and spin blur with one parameter switch. The center can be placed anywhere in the frame in either normalized or pixel coordinates, and the effect adapts to any source resolution without manual recalculation.
Troubleshooting
| Symptom | Likely Cause | Fix |
|---|---|---|
| Node cooks but image is completely black | Input not connected or wrong node has display flag | Connect input 0 and set the display flag on zoom_blur_cop1 |
| Blur Pixels slider has no effect | Blur Mode is set to Radial Blur (Blur Pixels is hidden in that mode) | Switch Blur Mode to Zoom Blur |
| Blur looks grainy or shows bands | Samples too low for the blur extent | Raise Samples (try 60–80 for finals) |
| Center placement looks wrong in Pixel mode | Pixel Y=0 is bottom-left, not top-left | To target a point N px from the top of an H-tall image, set Center Y (px) to H − N |
| Cook is slow | High sample count combined with a large image | Lower Samples during layout, raise for final render |
| Result looks identical to the input | Display flag is on the File node, not on zoom_blur_cop1 |
Click the display flag on zoom_blur_cop1 |
Building from Source
If you need an HDA compiled under your own Houdini license (to avoid the Indie/Apprentice flag):
- Download
build_zoom_blur_cop.py - Run:
hython build_zoom_blur_cop.pyOr with a full path:
/opt/hfs21.0/bin/hython build_zoom_blur_cop.py - The script writes
zoom_blur_cop.hdain the same directory.
Notes
@Pcoordinate space: inside the COP wrangle,@P.xruns from −1 to +1 across the image width;@P.yis aspect-ratio-corrected (not clamped to ±1 on the Y axis).- Large Blur Pixel values beyond the image width still work — samples that land outside the image boundary return black (the volumesample clamps to the image edge, which for images with alpha is transparent).
- The pre-built HDA was compiled under Houdini Indie. Loading it in a full FX session will flag the scene as limited-commercial. Build from source to avoid this.