New Collection with Selection

This tutorial was auto-generated by Funkworks.
Make a new collection and move your selected objects into it in one click — straight from the Outliner right-click menu, where you were already reaching for “New Collection.”
The Problem
Blender can already create a collection and move your selection into it — the operator lives at M ▸ Move to Collection ▸ New Collection. But that’s not the button you reach for. When you want to group a few objects, you click the Outliner’s New Collection button — and Blender hands you an empty collection sitting next to your still-loose objects. Now you drag each object in by hand, or undo and go hunting for the New Collection entry buried in the M menu.
The Outliner’s New Collection action ignores your selection. Making it respect the selection is a standing request for this corner of the UI, open since 2020: “once the new collection is created, Blender would automatically move the previously selected objects into the collection.”
This addon doesn’t add a new capability — it puts that create-and-move operation right where you expect it: the Outliner right-click menu and the 3D viewport’s Object ▸ Collection menu. One click: new collection, your selection inside it, nested under whatever collection was active.
Installation
- Download
auto_add_to_collection.py - In Blender: Edit > Preferences > Add-ons > Install
- Select the downloaded file
- Enable New Collection with Selection in the list
Tutorial
By the end of this tutorial you will have grouped a loose set of objects into a new, correctly-nested collection in a single click — no dragging, no M-menu, no cleanup.
What You’ll Learn
- Where the New Collection with Selection command lives (Outliner and viewport)
- How it differs from the Outliner’s built-in empty New Collection button
- That it performs a true move (objects leave their old collection, no duplicates)
- How to rename the new collection from the redo panel
Prerequisites
- Blender 4.0 or later
- New Collection with Selection addon installed and enabled
- A scene with a few objects loose under the Scene Collection (Shift+A a couple of cubes is fine)
Step 1: Start With Loose Objects
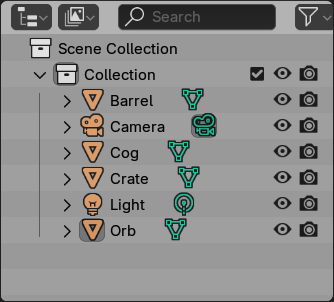
In the default scene, add a couple more objects (Shift+A > Mesh > Cube, twice) so you have three or four objects sitting directly under Collection in the Outliner. This is the everyday situation: a handful of objects you now want to gather into their own group.
Checkpoint: The Outliner shows your objects listed flat under the Collection (or Scene Collection) entry, none of them grouped.
Step 2: Select the Objects to Group
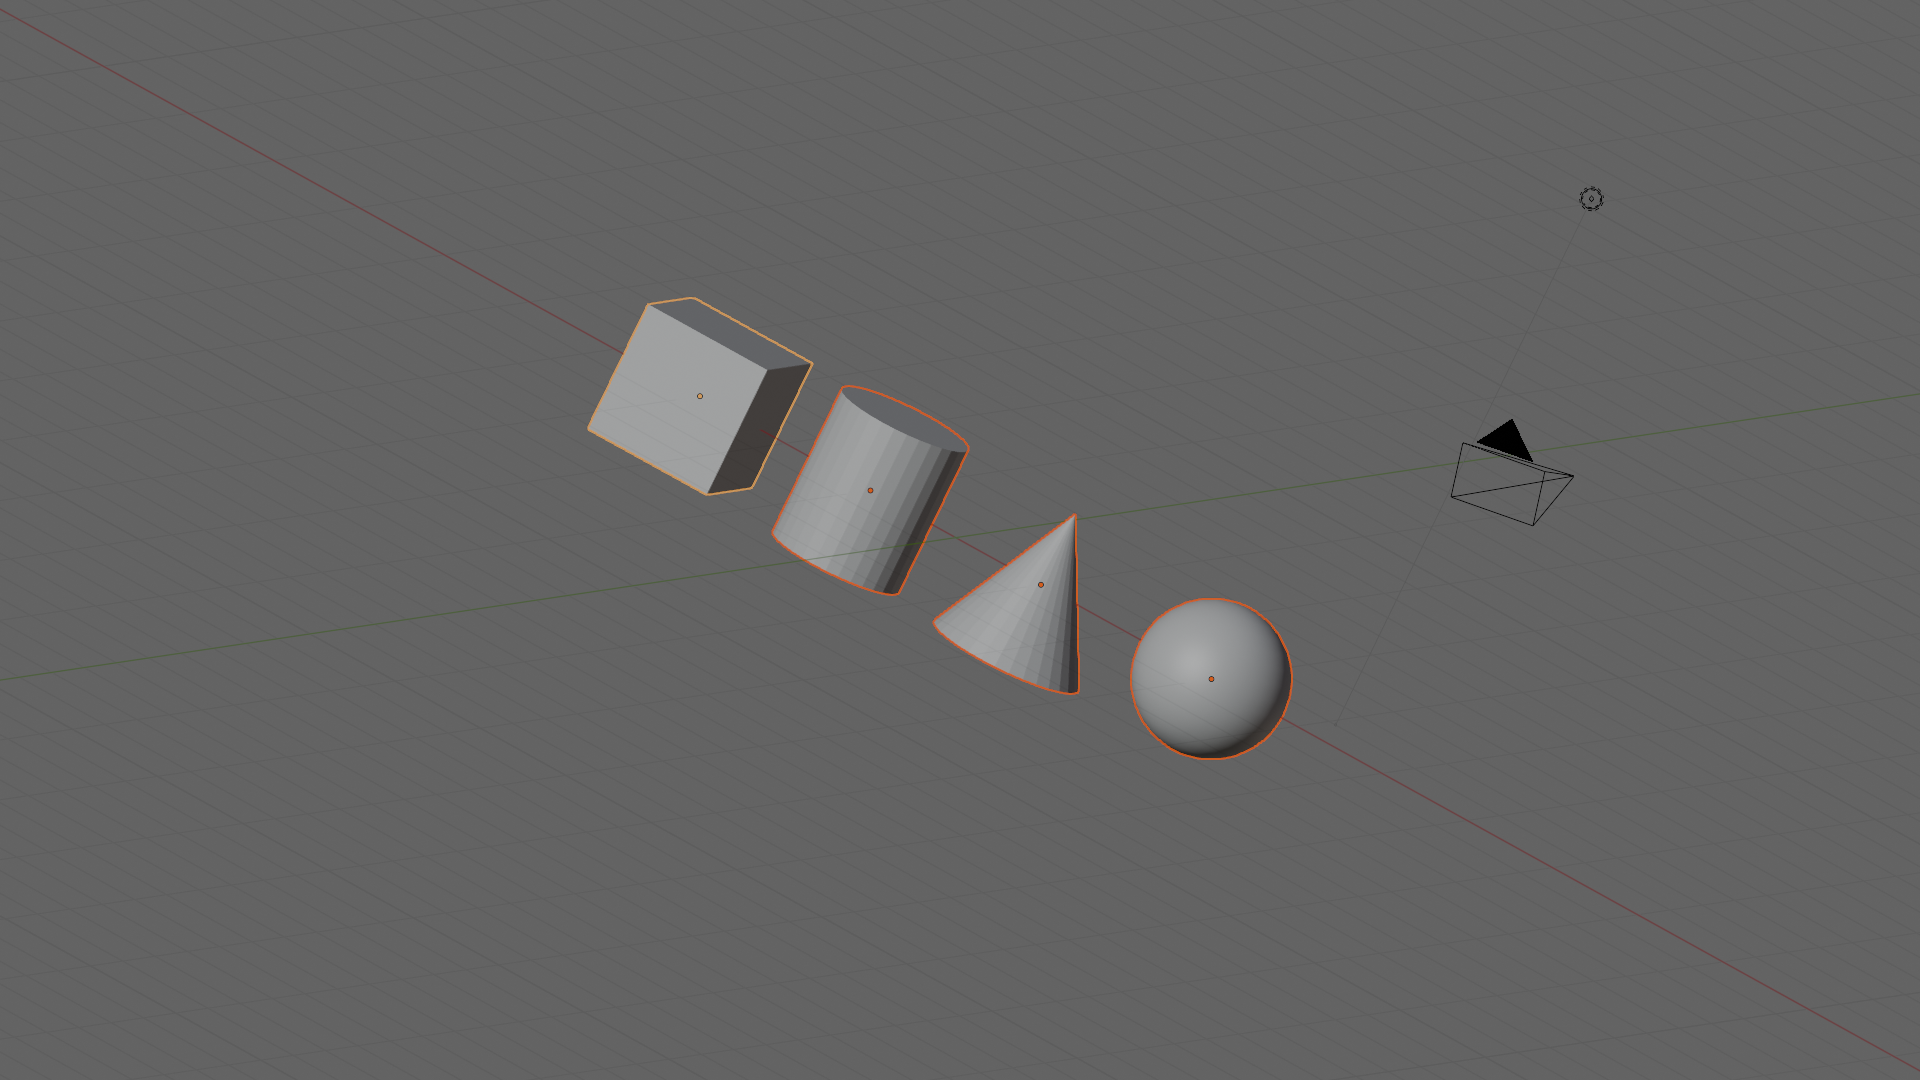
In the 3D viewport (or the Outliner), select the objects you want in the new collection. Box-select with B, or click the first and Shift+click the rest. The last one you click becomes the active object — that’s fine, any selection works.
Checkpoint: Your target objects are highlighted; the header reports the selected count.
Step 3: New Collection with Selection (Outliner)
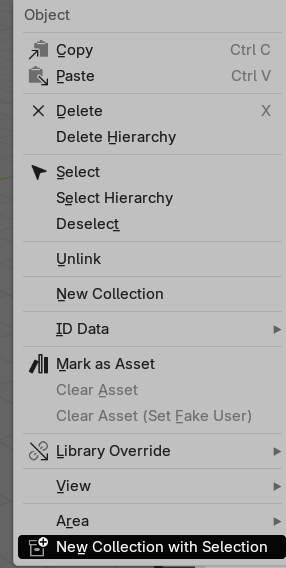
Right-click an object or collection in the Outliner to open the context menu and choose New Collection with Selection.
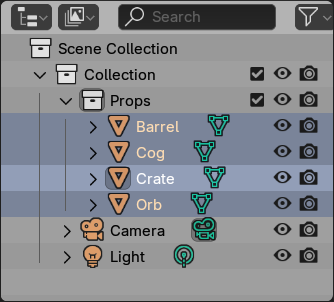
Checkpoint: A new collection appears in the Outliner and your selected objects are now nested inside it — no longer loose. The new collection is highlighted as the active collection.
Step 4: Or Use the Viewport Menu
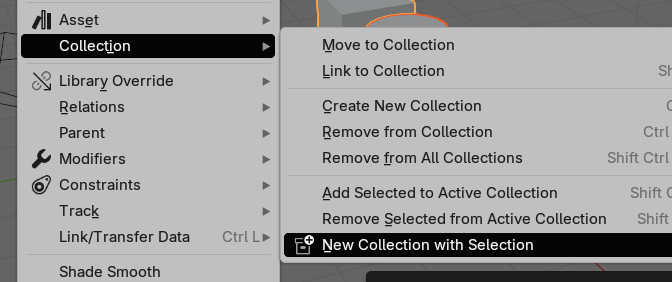
Prefer to stay in the 3D viewport? The same command lives under Object > Collection > New Collection with Selection in the viewport header (and works on whatever you have selected).
Checkpoint: Running it from the viewport produces the same result as the Outliner route — a new collection holding your selection.
Step 5: Rename From the Redo Panel
The new collection is named Collection by default. To rename it without leaving the flow, open the redo panel — press F9, or expand the panel in the bottom-left of the viewport — and type a new name into the Name field. The collection updates immediately.
Checkpoint: The collection in the Outliner takes the name you typed; the objects stay inside it.

Result
You turned a loose pile of objects into a named, nested collection with one menu click. The command behaves like the Outliner’s New Collection button — it nests under the active collection and makes the new collection active — but it brings your selection along instead of leaving an empty shell.
Because it performs a true move, each object ends up in exactly one collection (no duplicate links to clean up later), matching Blender’s own Move to Collection semantics.
Troubleshooting
| Symptom | Likely Cause | Fix |
|---|---|---|
| New Collection with Selection is greyed out | Nothing is selected — the command needs at least one selected object | Select your objects first, then open the menu |
| Command is missing from the menu entirely | Addon is not enabled | Edit > Preferences > Add-ons, search “New Collection with Selection”, check the box |
| The new collection is not where I expected in the hierarchy | It nests under whichever collection was active | Click the destination collection in the Outliner first to make it active, then run the command |
| An object did not move | It lives in a linked/library collection that can’t be edited | Make the collection local before moving its objects |
Notes
- It’s a move, not a copy. Selected objects are unlinked from their current collections and linked into the new one — exactly one collection membership each, like Blender’s Move to Collection.
- Nests under the active collection. The new collection is created as a child of the active collection (the same place the Outliner’s New Collection button would put it), then made active itself so your next addition lands inside it.
- Two entry points, one behavior. Outliner right-click and viewport Object ▸ Collection run the identical operator; use whichever is closer to your cursor.
- Rename anytime. Default name is Collection; set it in the redo panel (F9) right after, or double-click it in the Outliner later.
Requirements
- Blender 4.0 or later (verified on 4.2 LTS)